PostgreSQL HA on Docker with pg_auto_failover
Create a highly available infrastructure for databases and applications, We'll focus on setting up HA PostgreSQL on Docker, using the pg_auto_failover.
We are going to discuss how we set up high availability across our network. This will be split up to several parts which touch various components that I personally run in my networks.
All the commands here are run on Ubuntu 22.04 server minimal and use the default values. All machines need to have docker running, though you can also just run parts of it dockerised and others on physical machines.
Some links may be affiliate links that keep this site running.
Introduction
Some of my selfhosting is done for business purposes, and to offer services according to my own motto of “service excellence” I decided it is time to build a highly available infrastructure for the databases and applications that serve the business. The solution has been build with HAProxy, Cloudflare, Netbird, PostgreSQL, repmgr, MariaDB and Galera Cluster.
Today I’m going to cover setting up HA PostgreSQL on Docker with the help of pg_auto_failvoer - it is a postgres extension that works on monitoring the database and redistributing the master/replica roles as well as initiating the processes to bring replicas up to day. The docker image that is used has PostgreSQL together with the extentions necessary.
You can also find more information at the pg_auto_failover docs. I preferred the image by livindocs as it seems more maintained and updated compared to the citusdata one - for the docker image documentation, check out the docker hub repository
Install NetBird
Learn here how to selfhost Netbird, otherwise you can install tailscale or other preferred overlay networks. Enable UFW to allow connections only from Netbird interface, once you run the last command sudo ufw enable tou may get dropped off if you are not connected to the Netbird network. You will have to reconnect again, but this time to the Netbird IP of the machine, so make sure to note or retrieve your Netbird IP beforehand.
1
2
3
4
5

sudo ufw allow in on wt0
sudo ufw default deny incoming
sudo ufw default allow outgoing
sudo ufw route allow from 100.64.0.0/10 to any
sudo ufw enable
Initialise monitor
You’re going to need to have a “monitor”, that machine is going to check the status and sync all of your postgresql instances together. I haven’t managed to figure out how to make it listen and use the hostname of the host it is currently on right now though and so you will be mapping the network mode to “host” in the docker file and commands.
For those that use k8s and docker swarm, it should work easier as you can just reference internal hostnames and use the internal resolver services to reach the various containers/pods.
If you are not using swarm or k8s, or your name resolution is not configured properly, use the
/etc/hoststo populate a mapping of IP addresses and hostnames.
We are going to create our docker directory and change to the correc priviliges just in case.
1
2
3

sudo mkdir /docker/postgresql/db -p
sudo chown 1000:1000 /docker/postgresql/db
cd /docker/postgresql
This has created a directory in the path /docker/postgresql/db and this is where the monitor is going to set up it’s own separate database where the state of the cluster is going to be kept. Let’s switch to that director.
We need to first initialize the monitor and pull the container, to do so we need to run the following command. Don’t worry where you run it as long as you replace the folders to the correct values it should be fine.
1
2
3
4
5
6
7
8
9
10

docker run --rm \
  --network host \
  -e PGDATA=/var/lib/postgresql/15/data \
  -e PG_AUTOCTL_DEBUG=1 \
  -e XDG_CONFIG_HOME=/var/lib/postgresql/.xdg_config \
  -e XDG_DATA_HOME=/var/lib/postgresql/.xdg_data \
  -v /docker/postgresql/db:/var/lib/postgresql \
  --name monitor \
  livingdocs/postgres:15.3 \
  pg_autoctl create monitor --ssl-self-signed --skip-pg-hba --run
 Initialise pg_auto_failover monitor
Once the container and the data set is initialized you can stop the container and remove it, we do not have a need for it anymore. We now need to edit the pg_hba.conf file to allow access from other machines in our network.
1

user@monitor:/docker$ nano /docker/postgresql/db/15/data/pg_hba.conf
Append to the end of the document the following lines:
1

hostssl pg_auto_failover autoctl_node   100.64.0.0/10           trust
-
hostsslspecifies that the connection to your PostgreSQL database should be made over SSL, a secure method of communication that encrypts the data. -
pg_auto_failoveris a service used to automate the failover procedure. Failover is a backup operational mode in which the functions of a system are assumed by secondary system components when the primary system becomes unavailable. -
autoctl_nodeis a specific user who is given control of the automated failover process. -
100.64.0.0/10represents a range of Netbird IP addresses. These are the devices that are permitted to connect to your PostgreSQL database. -
trustmeans that the system trusts all the incoming connections from the specified IP range and doesn’t require a password for them.
The entire line is essentially allowing secure, password-free connections to your database’s failover system from a specific range of IP addresses.
Set up a compose file for monitor
Once we are done with initializing the monitor, lets set up a docker-compose file that will run the monitor and restart when needed.
1
2
3
4
5
6
7
8
9
10
11
12
13

version: "3.9"
services:
  monitor:
    image: livingdocs/postgres:15.3
    network_mode: host
    restart: unless-stopped
    environment:
      PGDATA: /var/lib/postgresql/15/data
      XDG_CONFIG_HOME: /var/lib/postgresql/.xdg_config
      XDG_DATA_HOME: /var/lib/postgresql/.xdg_data
    command: pg_autoctl run
    volumes:
      - /docker/postgresql/db:/var/lib/postgresql/
Bring it up with docker compose up -d and you can check the logs with docker compose logs -f monitor
 Starting a postgresql monitor instance
Initialise main database containers
The first database that you are going to initalize is going to be the master and all the configuration is going to be copied from it to the replicas.
You don’t have to initalize an empty container with an empty database, you can map the docker to an existing database to make it highly available and automated failover, just note:
- When you initalize replicas the folders will be purged.
- You set the permissions correctly.
- You edited the pg_hba.conf file correctly.
This needs to be run on every machine you’d like to have a replica on, please keep that in mind. You can run multiple databases there is no issue with that - that is explained at the end. To initialize the database we are going to run the command below.
Remember to replace in the docker command the following:
PG_AUTOCTL_NODE_NAME- Name of your db nodePG_AUTOCTL_CANDIDATE_PRIORITY- Priority of databasePG_AUTOCTL_MONITOR- Connection string to your monitor. You can find it in the log of the monitor docker container
1
2
3
4
5
6
7
8
9
10
11
12
13
14
15

docker run --rm\
  --network host \
  -e POSTGRES_USER=postgres \
  -e POSTGRES_PASSWORD=password \
  -e PGDATA=/var/lib/postgresql/15/data \
  -e PG_AUTOCTL_NODE_NAME=SG-DB-1 \
  -e PG_AUTOCTL_CANDIDATE_PRIORITY=100 \
  -e XDG_CONFIG_HOME=/var/lib/postgresql/.xdg_config \
  -e XDG_DATA_HOME=/var/lib/postgresql/.xdg_data \
  -e PG_AUTO_CTL_DEBUG=1 \
  -e PG_AUTOCTL_MONITOR="postgres://autoctl_node@TOK-Monitor:5432/pg_auto_failover?sslmode=require" \
  -v /docker/postgresql/db:/var/lib/postgresql \
  --name postgresql_ha_main \
  livingdocs/postgres:15.3 \
  pg_autoctl create postgres --ssl-self-signed --skip-pg-hba --username postgres --formation default --run
{. file=”/docker/postgresql/docker-compose.yaml}
 Initialise database docker run command
To make sure it works, you will see at the end of the log on the primary:
1

pg_autoctl service is running, current state is "single"
The monitor will show you the following:
1

INFO New state for node 1 "database name" (databasename:5432): single -> single
You can stop the container as we need to do another small change here. you need to edit the pg_hba.conf file once more, this time it is for the machines that are going to connect to the primary for replication. After you edit the file, append the following lines at the end:
1
2
3
4
5

hostssl "postgres" "postgres" 			100.64.0.0/10 trust
hostssl all "pgautofailover_monitor" 	100.64.0.0/10 trust
hostssl replication "pgautofailover_replicator" 100.64.0.0/10 trust
hostssl "postgres" 	"pgautofailover_replicator" 100.64.0.0/10 trust
host	all		all		100.64.0.0/10 md5
Starting up the postresql container
Let’s create the docker compose file to run the container, you’ll need to replicate the file configuration with the appropriate changes as those are mentioned above.
1
2
3
4
5
6
7
8
9
10
11
12
13
14
15
16
17
18

version: "3.9"
services:
  postgresql_ha_default:
    image: livingdocs/postgres:15.3
    network_mode: host
    environment:
      POSTGRES_USER: postgres
      POSTGRES_PASSWORD: password
      PGDATA: /var/lib/postgresql/15/data
      PG_AUTOCTL_NODE_NAME: hk-db-1
      PG_AUTOCTL_CANDIDATE_PRIORITY: 100
      XDG_CONFIG_HOME: /var/lib/postgresql/.xdg_config
      XDG_DATA_HOME: /var/lib/postgresql/.xdg_data
      PG_AUTO_CTL_DEBUG: 1
      PG_AUTOCTL_MONITOR: "postgres://autoctl_node@SG-Gateway:5432/pg_auto_failover?sslmode=require"
    command:  pg_autoctl run
    volumes:
      - /docker/postgresql/db:/var/lib/postgresql/
We are going to bring this up now:
1

docker compose up -d && docker compose logs -f
If at any point you get the error:
FATAL Failed to find a local IP address, please provide --hostname.
That means that your name resolution is not set up properly.
Now continue running this section on all the machines you are looking to add as replicas, you can check the monitor log to see how those are added in. Make sure that your replica stabilizes before you terminate the initial docker initialization command. you will usually see a line that says Transition complete: current state is now "secondary"
Verifying
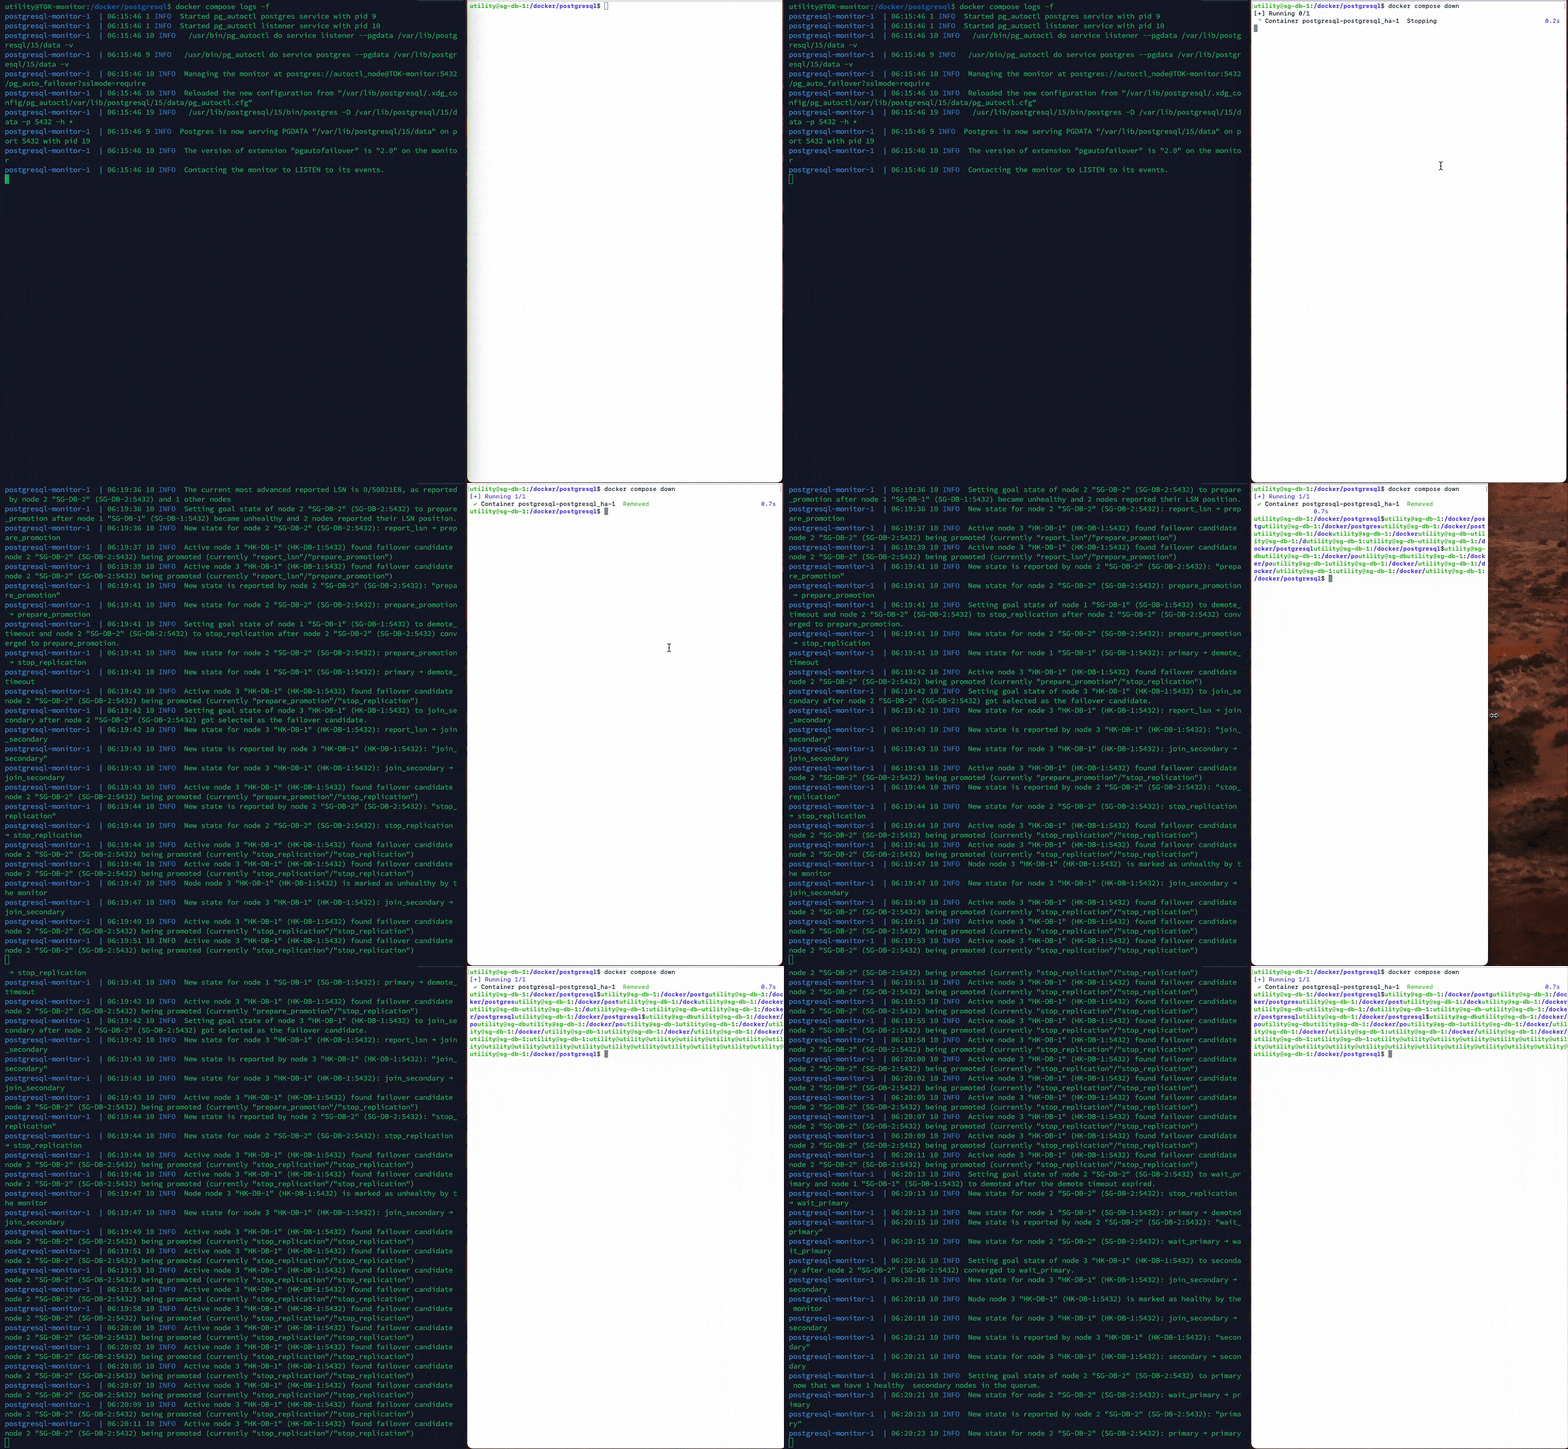
You can monitor the logs of the monitor container and bring down your primary, you will see that after a bunch of checks, your primary will be demoted and a new one will be brought up instead of it.
 pg_auto_failover terminal failover example
And we are done! Hooray!
It is important to remember that only the primary aceepts write queries in this configuration and so you will need to know who your primary is first before connecting to it. The standbys will only allow read queries.
Extra: Creating formations
You can have multiple clusters managed by the monitor. That is done with the use of formations. If you check the initialization of the database, there is a variable named –formation, it is set to default which is the initial formation you will have.
You will need to create more formations first on the monitor before you can actually add those in the initialization. You can find more information about it at the documentation page.

